| Chapter 2. The Admin Interface | ||
|---|---|---|
   | ||
| Chapter 2. The Admin Interface | ||
|---|---|---|
| ||
Table of Contents
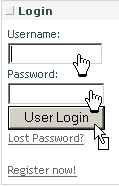
The XOOPS content management system comes with an integrated membership registration section. Once registered, users can login by entering their username and password in forms displayed in a login block on the page. New registration is accomplished by pressing the link. This opens a page where an anonymous user may register by inputting basic details, like a user name and contact email. Registration allows access to restricted content of the site as defined by the site administrator. Site administrators can elect not to display the login form if they wish, or simply disallow registration. However the form is displayed on the home page by default on initial installation.
Login is required to access any restricted content of the site. Successful login is accomplished by inputting a correct username and password as confirmed during the registration process.
If an unregistered user submits a URL that deliberately or accidentally calls a file or page that is designated as “restricted content”, then the login page is automatically returned by default. This defeats the URL call until authorised access is confirmed by successful login.
Site administrators need to login to access the admin part of a site.
Registered users may login to access other parts of the site that have been designated as registered members content. Registered users may also be given extra rights, such as posting in forums, commenting and submitting news items etc.
Administrators of a site can also define extra-restricted areas (not accessible to registered members) that display unique content. They can then assign any registered member access rights to that area.
All these access features are defined and controlled in the “groups” section in admin and are discussed in detail later in the manual.
For now let's describe the login procedure as follows:
As site administrator
As registered user
Failed login procedure
Logging out
During the installation of XOOPS you were asked to input an “Admin name” and “Admin password” Both these strings are case sensitive and should be used to login to your site as “site administrator”. A site administrator has unrestricted access to the site and allows entry to the website administration section, as well as the normal registered user section. Both usernames and passwords may be changed in the administration->edit user section. Make certain your login strings are unique and secure, as they will grant access to any user who inputs them!
Once logged in as administrator a new menu section appears in your home page sidebar with a link to . This link appears because of your login status as administrator and is the link to the main control center for your site. It is possible to promote any registered user to site administration level, though for security reasons this is usually assigned to select trusted personnel only.
Any visitor may register with your site (if you allow site registration) granting access to restricted content, interactivity and privileges, depending on how your site is configured. They will not have access to the site administrator's link to the admin section, nor will they be able to gain access by inputting the admin URL in the address bar. (Access is combined with a cookie function)
Users can only register using unique usernames and password combinations. As administrator you may also assign certain usernames (in Site admin->user info settings) that you want to prevent new registrants using. Once any combination of username/password strings has been used the system will not allow duplication for security reasons.
Registered users can change their passwords at any time by updating their account information. Once a registered member logs in successfully, they are returned to the site page they were viewing. Other features and menus of the site may now be available to them, depending on how the site is configured.
If for any reason an unrecognised combination of username and password is used during login, the system will return an “Incorrect login” page. A subsequent page displaying the login form quickly follows this. There is also an extra input form for requesting a new password by email should it be lost or become insecure. Users should re-enter their login details and try again, or request a password replacement by email. The login box also displays a link that goes directly to this page.
If a new password is required, fill in your email address in the appropriate form. A registration confirmation email is sent to the address entered if it is recognised in the database. Click on the link in the email to activate another email post containing the new password. Use the new password along with your original username to login on the next visit. You will probably want to change the password back to something more memorable in your account details.
| | |
| 1.7. Themes and templates | Home | 2.2. Control panel home |