| 2.11. Modules | ||
|---|---|---|
| Chapter 2. The Admin Interface |    | |
| 2.11. Modules | ||
|---|---|---|
| Chapter 2. The Admin Interface | | |
Modules provide essential content for any XOOPS website. Once the administrator has installed the core scripts and configured basic functions in the administration control panel, they will need to consider which modules will fulfil the required content.
This needs some planning, both for the modules to be displayed and also the layout on the pages. It is a good idea to review other XOOPS sites and see which modules are used to display various types of content. This is easily done by opening any XOOPS site and hovering over the menu links on the left and right hand side panels. At the same time look at the URLs displayed in the status bar on your browser. You should see addresses like this: http://the_site.com/modules/wfsection/... All modules are stored in the /modules/ directory, thus the following sector of the address (in this example “wfsection”) shows the module that will display contents of that menu link.
If you open the page for the link it will show an example of how the module is used and the type of content it displays. Reviewing other sites like this will also give you some good insight into layout and design capabilities.
All modules need to be specifically designed for the XOOPS content management system. Currently there are 3 grades of modules available:
Official certified modules available from XOOPS parent sites;
3rd party certified modules;
3rd party uncertified modules.
The recommended guidelines for acquiring these are described elsewhere in this manual.
Modules are normally packed in a compressed file format such as .zip or .tar format. You will need a file expander tool like WinZip or winrar to decompress the package and make the files useable.
After downloading and decompressing the module package, it is important to maintain the current directory structure and distribution of all associated files.
![[Note]](img/admon/note.png) | Note |
|---|---|
It is not essential to upload “ancillary files” such as readme/changelog/install and other non-operational files. Likewise, you may wish to remove any language packs that are not required in your installation. It is wise however to retain any index files in all directories, regardless of blank content. This is a security measure. Leave files alone, if you are unsure. | |
Once the module package is unzipped, study the structure of the files in the local computer. Some modules are ready for uploading to the root directory instead of just the /modules/ directory.
Normally you will need to upload the files into the /modules/ directory which will be a second level sub-directory within your site root: e.g. http://your_xoops_site.com/modules/your_new_module_package. However, some modules have extra files that need to be uploaded to other folders such as the /include/ and the /class/ directories.
It is important to upload ONLY the directory holding the main file set. Some modules are packed within nested sub-directories 2 or 3 layers beneath the package root, like this: my downloads V1.23/my_downloads/mydownloads/(this directory contains the main file set)
n this case be certain to upload the directory holding the main file set, NOT the root (my downloads V1.23) If you upload the module file set within nested directories by mistake the XOOPS install system will not register the new module package!
Readme, install, changelog and other information files.
Always view any Readme, install or changelog files if included. They often give important details about module installation requirements, setup and usage. If you require further information and assistance, they may also contain the authors website address and/or email contact.
Many module scripts are self-configuring once installed. However, some require some initial configuration as detailed in Ancillary files described above. Make sure you edit any files in a plain text editor, or application suitable for the file type. It is unwise to use web-authoring WYSIWYG applications such as FrontPage™ or Dreamweaver™ as they can add spurious code to your files. If you intend to make any extensive edits, prepare a backup beforehand.
FTP is the preferred method of file transfer as it allows you to transfer a whole module directory automatically and maintain it structure.
If you use a browser upload with limited file transfers, be sure to maintain the original directory structure.
When you are sure your files are ready, upload the file set complete in its directory to the ./modules/ directory on your server.
You may need to change “read/write/execute” permissions for various files and folders, if stated in Ancillary files supplied with the package. Settings can vary between different server operating systems. Some modules will only work correctly with register_globals[1][1] set to “on”. Please be aware of these requirements when installing modules.
Once the file set is uploaded and permissions are set if required, you can now visit your Control panel home page and install the module.
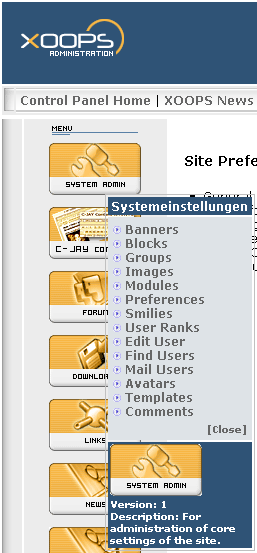
Go to system admin->modules. Module administration page.
This section displays a table with any installed modules in the top section of the page. Beneath this is a section displaying any modules residing in the ./modules/ directory on your server that have not been installed, or have been deactivated.
In this section you will see a table with headings for “MODULE” “VERSION” AND “ACTION”.
Your new module should be listed here with a “module” under the module column, and an “install” and “information” icon under the “Action” column.
Click the “install” icon, as indicated below. This returns a confirmation page, click on the install button if you wish to proceed. If all goes well, you will see a new page with a list of files and any database tables created for your new module.
Click page.
You will now see your installed module in the top list of active installed modules.
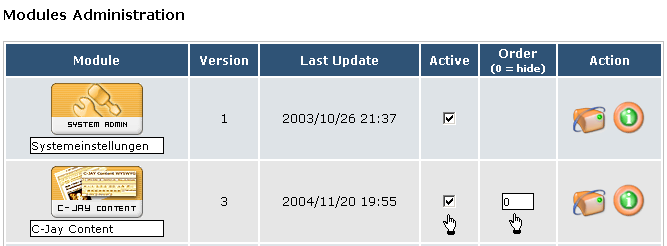
The modules administration table has headings for: Module, Version, Last Update, Active, Order, and Action.
This page gives you options to “Activate” the module in your website or keep it installed but hidden from any menus or interaction. You can also deactivate and/or uninstall the module from this page, as we will describe later.
Ticking the “Active” box makes the module active in your website and admin section and also visible in your menu systems. Remember, you still need to select in which pages, position and groups the module will appear in.
Inputting an order number in the adjacent “order” column tells the module page link where to appear in the menu system. Leaving the order column with a “0” will keep the module active, but prevent any links appearing in the page menu systems. This is useful if you utilise custom menus or links to display pages.
| Note |
|---|---|
Click button at the bottom of this table to activate any changes made. | |
While we are still in the module administration page, let’s complete the options here by describing how to deactivate and uninstall a module.
Looking at the table at the top of this page, you will see a list of your registered modules.
There is a column with the label ‘Active’, as well as a checkmark for every active module. Unmark the module you want to uninstall and press at the page bottom.
You’ll go to a confirmation page where the desired change is highlighted in red. Just press again to confirm.
You’ll receive a success message stating that module you selected was successfully deactivated. Now click on the link .
Back in the Modules administration page, in the “Action” column you will now see a new status icon. The module you just deactivated will have an additional icon at the centre, showing a tiny red light. This icon's action is to complete the process by deleting the module. Click on the icon.
You'll go to another confirmation page asking you if you're sure you want to uninstall. Click .
You'll see a page with the changes just made. What happens is the module has been now been deactivated and disconnected from the XOOPS' system. However the physical files still reside on the server in the modules directory where you uploaded them. Click on ‘Back to module administration’ page
The module you just uninstalled won't be on the registered modules list at the top of the page, but now at the bottom of the page, among the modules that are available in XOOPS' modules directory but haven't been installed. You are now back where you started after initially uploading the module.
| Note |
|---|---|
Uninstalling a module deletes all content associated with that module - the tables defined by the module are dropped, and all blocks, templates, configuration options, comments, notifications, etc. associated with the module are removed from the database. Now the module is disconnected from the XOOPS core, if you wish to do so, you may safely delete the module files on the server manually. | |
Assuming you have not uninstalled your new module, let’s go back to System admin>Modules. Modules administration page where your new module is displayed in the active section and continue with the setup procedure.
Your new module will now appear in a table in the upper section of the module administration page indicating a successful installation (see Figure 2.11, “Installed module administration”).
Beneath the module icon you will see the module name in a small form box. You can rename the module here by inputting this form. The name supplied here will be the name displayed your site’s main menu. This can also be changed elsewhere in the configuration, as we will see later.
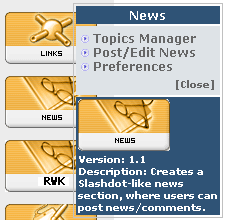
When hovering or clicking on the module icon on the left of the page, some Modules will display a menu with links to specific settings and options only for that module. Some modules do not have an administration menu, in which case no menu is displayed.
Each module has individual functions and display options. Unless you have doucmentation for a module, you will need to experiment and explore the various options for using the module.
The following guidelines are for configuring the module within the system and not related to the particular workings of any one module.
Go to system admin>blocks administration page.
This next section assumes the module is correctly installed and that no error messages were encountered during the install process.
Many modules share common properties with blocks, already described in Section 2.12.5, “Search Options” in this manual. These are typically:
The position of where the block is displayed on the web page.
Which pages the block will be displayed in.
Which user groups are allowed to see the block
Please refer to section 3.3 above for configuring these options.
Some modules have different components for their operation. Thus, for example a news module is divided into 4 blocks:
Top news
Big story
Other news
News topics
In these cases each block will be identified in a “block description” and the module it relates to in the “module column” of the blocks administration page.
Many modules are interactive, that is they provide for user input and may produce display feedback and information as a result of that input.
As mentioned in a previous section, XOOPS provides a core system of user access rights through the “Groups” settings. When installing and configuring a new module, be sure to set the appropriate permissions in Administration Menu>System Admin>Groups>”Edit Groups”.
However, when installing a new module, some default permissions are applied to the groups of a XOOPS site.
“The Webmasters Group” - It is assumed that the webmaster always requires ultimate control of the site, so when a new module is installed, the Webmasters/Site Administrator Group is granted with all the access rights, in all 4 sets of rights.
“The Registered Users Group” - On installation of a new module, the Registered Users Group is granted with all the Module Access Rights and the Block Access Rights that are related to the newly installed module.
“The Anonymous Group” - When a new module is installed, the Anonymous Groups does not get any access rights on the newly installed module. If you want the Anonymous Group to access this module, you will have to set the permissions yourself.
“Groups created by Site Administrators” - All other groups that have been created by site administrators are not granted any rights upon the installation of a new module. As for the Anonymous Groups, site administrators have to set these rights themselves.
This concludes our first introduction to the XOOPS modules. There are many other refinements available to the more experienced user. These will be described in greater detail in the “Webmasters guide to XOOPS”
| | |
| 2.10. Mail Users | Home | 2.12. Preferences |